Counter Depth Refrigerator Installation and Maintenance Guide
Proper counter depth refrigerator installation and maintenance ensures energy efficiency, optimal cooling, and a long appliance lifespan. This definitive guide covers step-by-step setup, leveling, ventilation, and a crucial maintenance schedule to protect your investment.
Why Proper Installation and Maintenance Matter
A precise counter depth refrigerator installation and maintenance process ensures your appliance runs efficiently, keeps food fresh, and reduces repair costs. Improper setup often leads to uneven cooling, vibrations, and compressor strain. A poorly leveled fridge can even shorten its lifespan by 20% — but it’s easily preventable.
Incorrect counter depth refrigerator installation and maintenance can cause:
Higher compressor workload due to blocked airflow. (Source: GE Appliances)
Poor door swing clearance and weak ventilation. (Source: Maytag)
Pre-Installation Checklist
Before you unbox, review this counter depth refrigerator installation and maintenance checklist:
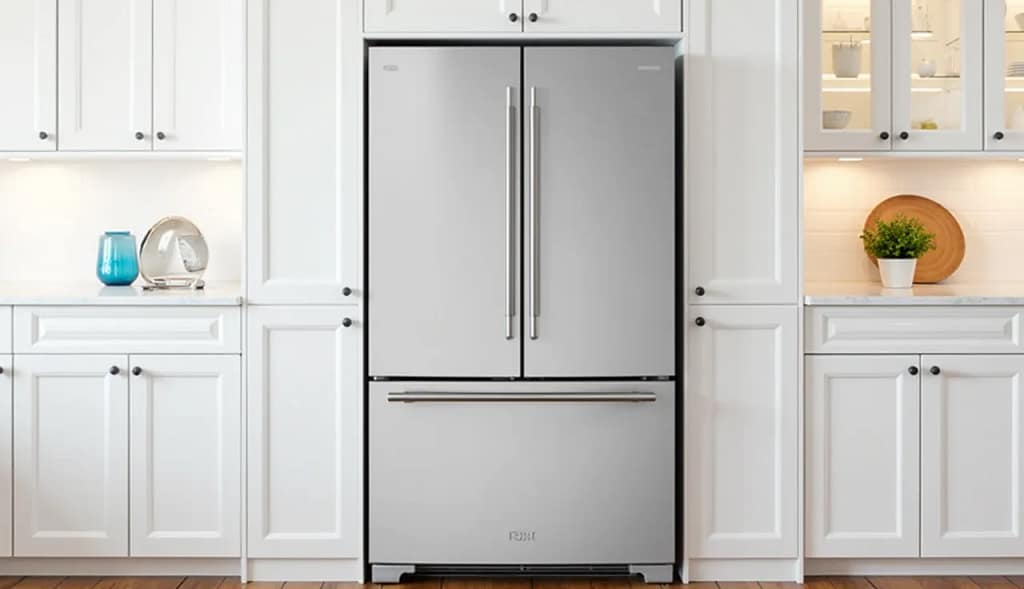
- Space Requirements: Unlike standard-depth models, counter-depth fridges are designed to align with your countertops. Precisely measure the width, height, and depth of the allocated space, ensuring you account for the crucial 1-2 inches of clearance at the back and sides for adequate ventilation. Inadequate airflow forces the compressor to work harder, increasing energy bills and causing wear. (Source: The Home Depot)
- Electrical Outlet Position: Your refrigerator requires a dedicated 115/120-volt, properly grounded 3-prong outlet. Ensure it is easily accessible and not shared with another major appliance to prevent circuit overloads.
- Water Line (for Ice & Water Dispensers): If your model has a dispenser, you need a nearby water line. For new installations, using a braided stainless-steel water line is recommended over copper or plastic for its durability and resistance to kinking. (Source: Whirlpool)
- Flooring Stability: Ensure the surface is even; leveling is vital for proper counter depth refrigerator installation and maintenance results.
👉 To ensure your appliance fits perfectly, check out our full Counter Depth Refrigerator Dimensions guide before installation.
Step-by-Step Installation Guide
Follow this methodical counter depth refrigerator installation and maintenance process.
Unboxing & Inspection
Carefully remove all packaging, including Styrofoam and cardboard. Inspect the unit’s exterior and doors thoroughly for any dents, scratches, or damage that may have occurred during transit. Verify that all included accessories—shelves, bins, ice maker parts, and the user manual—are present before disposing of the packaging.
Positioning the Refrigerator
With the help of another person, carefully slide the refrigerator into its designated space. Use a dolly or slide it on cardboard to protect your flooring. Remember to maintain the recommended clearance from the wall (usually at least 1-2 inches) and keep it away from heat sources like ovens and direct sunlight, as ambient heat makes the compressor work harder. (Source: ENERGY STAR)
Leveling the Fridge
A core part of counter depth refrigerator installation and maintenance is leveling:
Adjust front legs using a spirit level until balanced. An uneven fridge leads to compressor strain and misaligned doors.
Connecting the Water Line
For models with ice makers and water dispensers:
- Shut off the main water supply and connect the approved water line to the cold water valve.
- Connect the other end to the refrigerator’s water inlet valve, typically located at the bottom rear.
- Slowly turn the water supply back on and check for leaks at all connection points.
- Flush the line: Run several gallons of water through the dispenser (into a bucket) to clear the line of air and debris before making ice. This is a vital step in the counter depth fridge setup to prevent clogged filters and valves. (Source: GE Appliances)
Initial Power-On & Cooling Period
If the refrigerator was transported on its side, it is crucial to let it stand upright for at least 4 hours before plugging it in. This allows the compressor oil to settle. Once plugged in, set the thermostat to the manufacturer’s recommended setting and allow the refrigerator to cool for at least 24 hours before loading it with food. This ensures it reaches the optimal temperature for food safety.
Maintenance Schedule & Best Practices
Consistent refrigerator maintenance is non-negotiable for efficiency and longevity. Follow this schedule to keep your appliance in peak condition.
| Task | Frequency | Description & Benefit |
|---|---|---|
| Clean Condenser Coils | Every 6 Months | Dust and pet hair clog coils, reducing efficiency. Vacuum with a brush attachment. (Source: Sears Home Services) |
| Check Door Seals | Monthly | Ensure seals are airtight by closing the door on a dollar bill. If it slips out easily, the seal may need replacing. |
| Replace Water Filter | Every 6 Months | A clogged filter reduces water flow and quality. Follow manufacturer guidelines for your model. (Source: LG) |
| Defrost (if manual) | As Needed | Prevent frost buildup exceeding 1/4 inch to maintain cooling efficiency. |
| Wipe Interior | Monthly | Use a mild solution of baking soda and water to eliminate odors and bacteria. |
Consistent counter depth refrigerator installation and maintenance keeps energy bills low and prolongs life.
Cleaning Tips for Counter Depth Refrigerators
Proper cleaning is a cornerstone of effective counter depth refrigerator maintenance.
- Interior Cleaning: Avoid harsh chemicals. A solution of two tablespoons of baking soda to one quart of warm water is ideal for cleaning walls and shelves. It effectively deodorizes and cleans without damaging surfaces. Avoid bleach. (Source: Bob Vila)
- Exterior Cleaning: For stainless steel, use a dedicated cleaner and wipe in the direction of the grain to prevent streaking and scratching. For other finishes, a damp cloth with mild soap is sufficient.
- Coil Cleaning: Unplug before cleaning coils — an essential counter depth refrigerator installation and maintenance practice. Vacuum dust with a brush tool every 6 months. (Source: Whirlpool)
- Gasket Cleaning: Wipe the door gaskets (seals) with a cloth dampened in warm, soapy water to remove food residue and prevent mold growth.
Pro Tip Box:
💡 Safety First: Always unplug the refrigerator from the electrical outlet before performing any deep cleaning, especially of the coils or internal components.
Troubleshooting & Common Issues
When your counter depth refrigerator installation and maintenance isn’t followed precisely, issues can arise:
- Refrigerator not cooling properly? Check the door seals for tears or gaps. Ensure the condenser coils are not clogged with dust, which is a leading cause of cooling inefficiency.
- Water leaking underneath? Inspect the water line connections for tightness. Also, check if the defrost drain is clogged, which can cause water to overflow the drain pan.
- Noisy operation? Verify the unit is perfectly level. Ensure it is not vibrating against the wall or cabinets. Some noises are normal, but persistent knocking or grinding may require professional service.
- Ice maker not working? First, confirm the water supply is turned on and the water filter is not past its replacement date. Low water pressure is a common culprit. (Source: The Family Handyman)
Long-Term Maintenance Tips
Follow these ongoing counter depth refrigerator installation and maintenance strategies for top performance:
- Ambient Temperature: Keep the kitchen ambient temperature between 70°F and 75°F for optimal refrigerator efficiency. Temperatures above 110°F can severely strain the compressor.
- Avoid Overloading: Do not overload shelves or block the interior air vents. Proper air circulation inside the cabinet is essential for consistent cooling.
- Professional Servicing: Consider scheduling a professional inspection and servicing every 12-18 months to check refrigerant levels, electrical components, and seals—this can prevent costly repairs down the line.
Comparison Table
| Task | If Done Properly | If Skipped |
|---|---|---|
| Installation & leveling | Smooth, quiet operation | Vibrations & uneven cooling |
| Coil cleaning | Efficient energy use | Higher bills, overheating |
| Door seal check | Airtight performance | Air leaks & food spoilage |
| Regular servicing | Early issue detection | Costly long-term repairs |
| Proper water line setup | Leak-free function | Risk of flooding |
The difference proper counter depth refrigerator installation and maintenance makes is visible in both performance and lifespan.
Counter Depth Refrigerator Installation and Maintenance FAQs
How do I install a counter depth refrigerator by myself?
While possible, it’s a two-person job due to the weight and size. Follow the steps in this guide: unbox, inspect, position with clearance, level meticulously, connect the water line (if needed), and allow for the initial cooling period before loading food. (Source: Maytag)
How far should a counter depth fridge stick out?
A true counter-depth refrigerator is designed to align nearly flush with standard countertops (which are about 24–25 inches deep). The doors and handles will extend slightly beyond the counters, typically by 1–3 inches. (Source: KitchenAid)
How often should I clean refrigerator coils?
You should clean the condenser coils at least every six months. If you have pets that shed, increase the frequency to every three months to maintain peak efficiency and prevent overheating.
Can I use an extension cord for my refrigerator?
It is highly discouraged. Refrigerators require a consistent, dedicated power source. Using an extension cord can pose a fire hazard and lead to voltage drops that damage the compressor. Always plug directly into a wall outlet. (Source: UL Solutions)
Why is my counter depth fridge running constantly?
It may be due to poor ventilation or skipped counter depth refrigerator installation and maintenance steps like coil cleaning or leveling.
Conclusion + CTA
Mastering the art of counter depth refrigerator installation and maintenance is the surest way to guarantee the performance, efficiency, and longevity of your premium appliance. From the critical initial leveling and ventilation to the disciplined cleaning of coils and replacement of filters, each step contributes to lower energy bills, reliable cooling, and a significantly extended lifespan.
Follow this comprehensive installation and maintenance checklist to get the most out of your counter depth refrigerator—from a flawless setup to decades of peak performance.